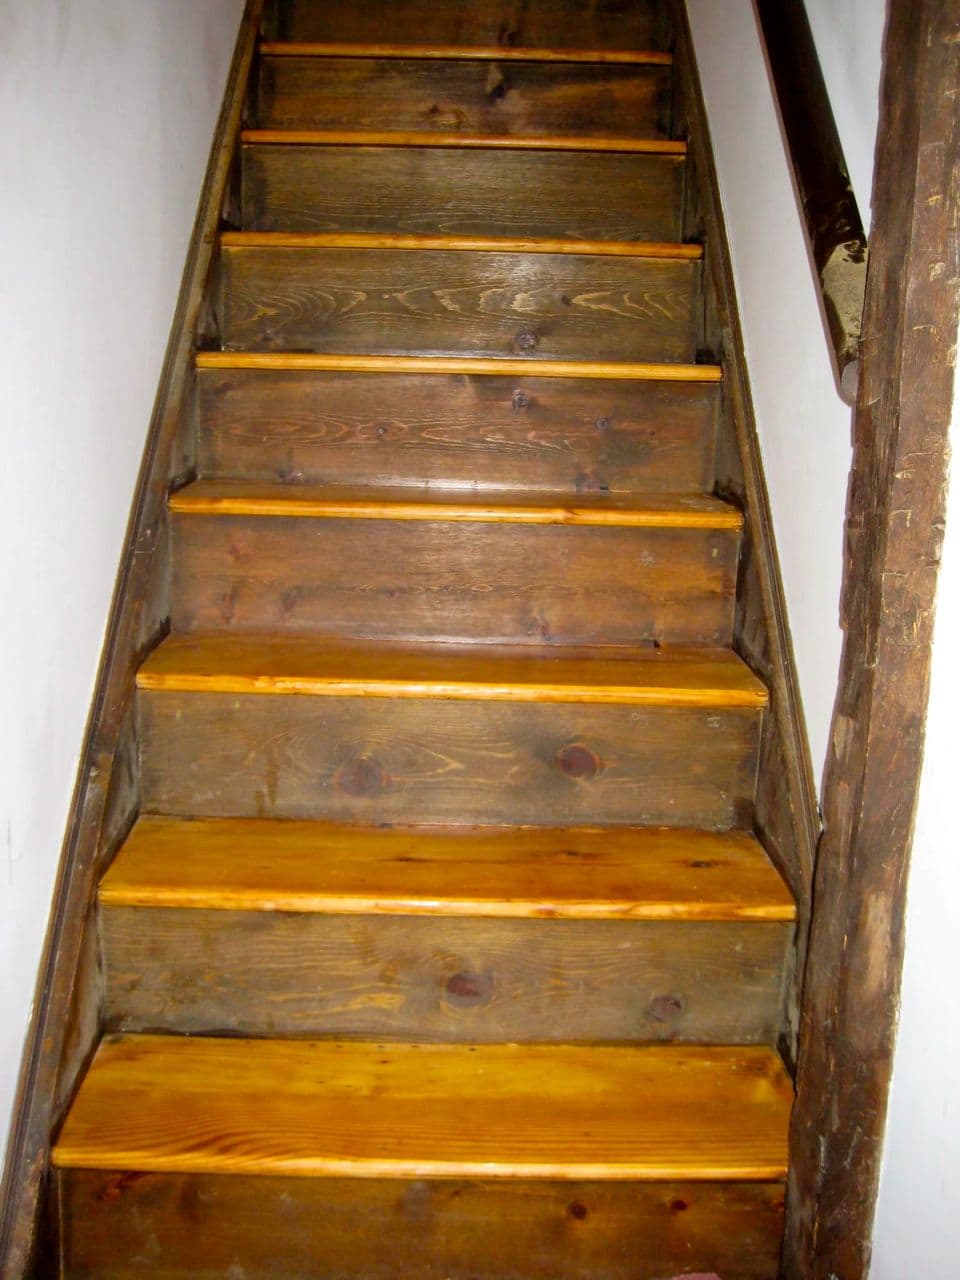
When we moved into this ol’ house of ours, the stairs leading up to the two guest bedrooms looked like this…

Eek! After pulling out the carpet and removing all of the nails, we had the tops of the stairs refinished professionally. Back in April, I was busy painting the stairs white to go from this…
…to this…
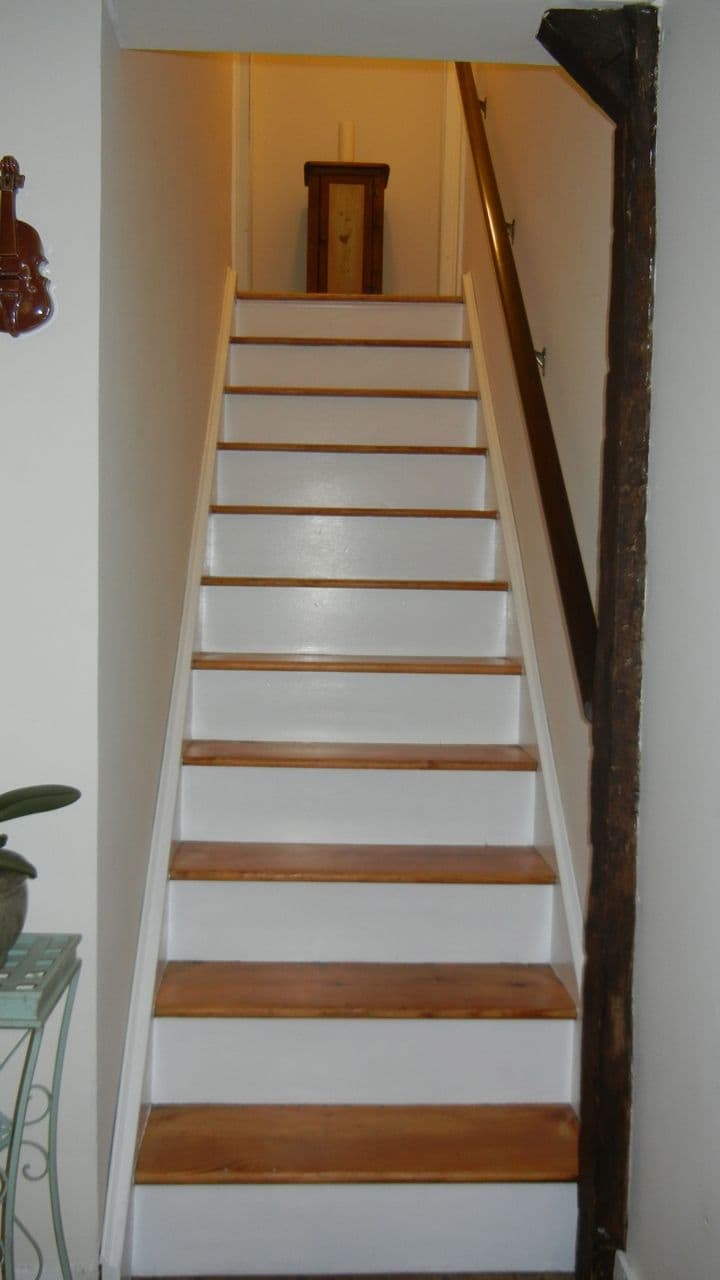
I’m still reeling over the difference a little paint can make on a set of very dark stairs. Read the full post about how I tackled the stairs here.
The issue I had with the finished stairway was minimal, but inconvenient nonetheless. The tops of the stairs were slippery. It must be my daily vacuuming…ha. Each time we’d head upstairs to access the attic or something in the guest rooms, we’d slip all over while wearing socks. And Griffin - forget it. He slips and slides all over trying to walk sprint like a maniac up and down the stairs. It scared me if we were to have guests over - particularly an elderly guest like my Nana or Grandma.
I searched all over for runners and the options that went with a runner. I had to consider nailing the runner down vs. screwing in a bar to hold the runner in place, patterned vs. solid, light vs. dark… it was frustrating and I couldn’t settle on anything. In the end, I stumbled upon a great little product called stair treads. Here’s a shot from the website.
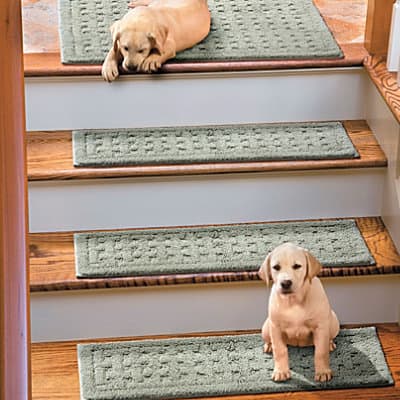
I was pretty much sold when I saw this picture. They must know their market. I was also sold on the treads because they have a latex backing so they stay in place, and they’re washable. Yes! Washable! An amazing find when you have a dog that loves to dig outside and then run up and down your stairs. They came in sets of 4, and I needed 11 treads, so I have one extra - which may come in handy one day. The total cost for my stairway upgrade was $73 with shipping. It was much cheaper than a runner, and I get so admire my painted handiwork, too. Bonus for keeping the white stair backs visible. I ended up buying the same color as shown above (picture from their website here). I think it was called sage, and it matched the green color in my living room rug to help the two linked spaces to feel a little more cohesive. I laid them down immediately upon opening the box, and now the stairs look like this…
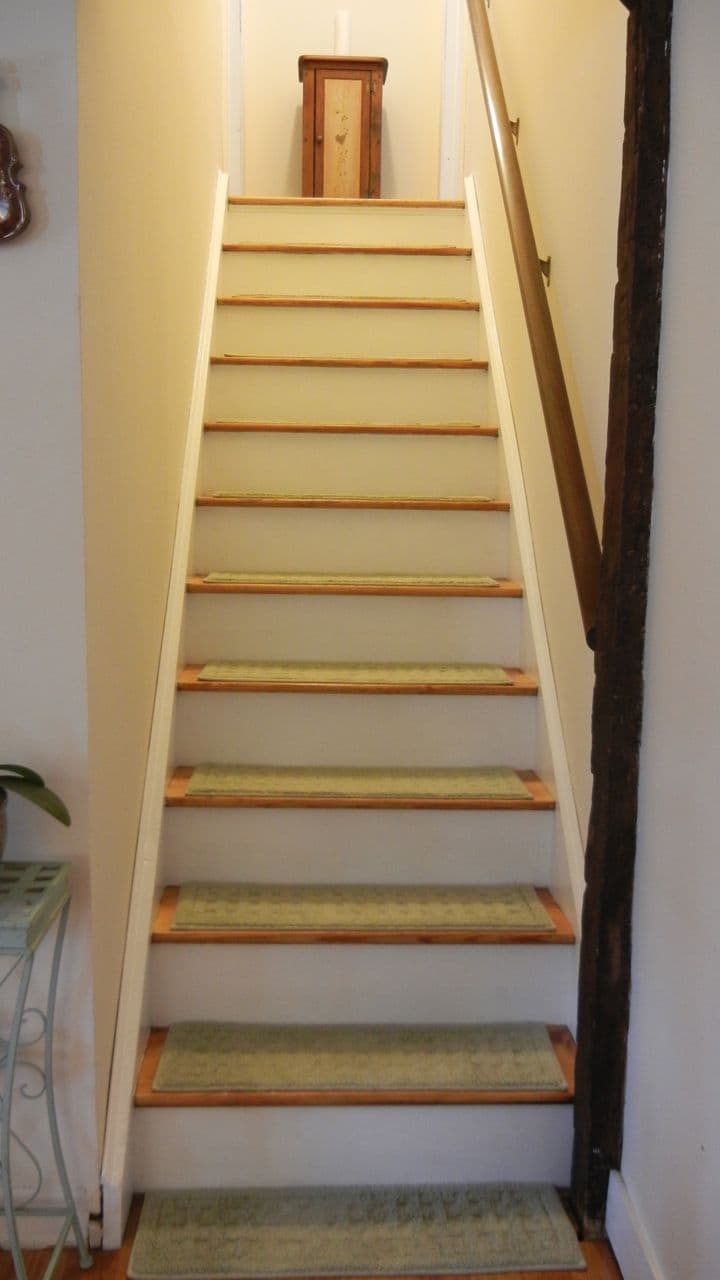
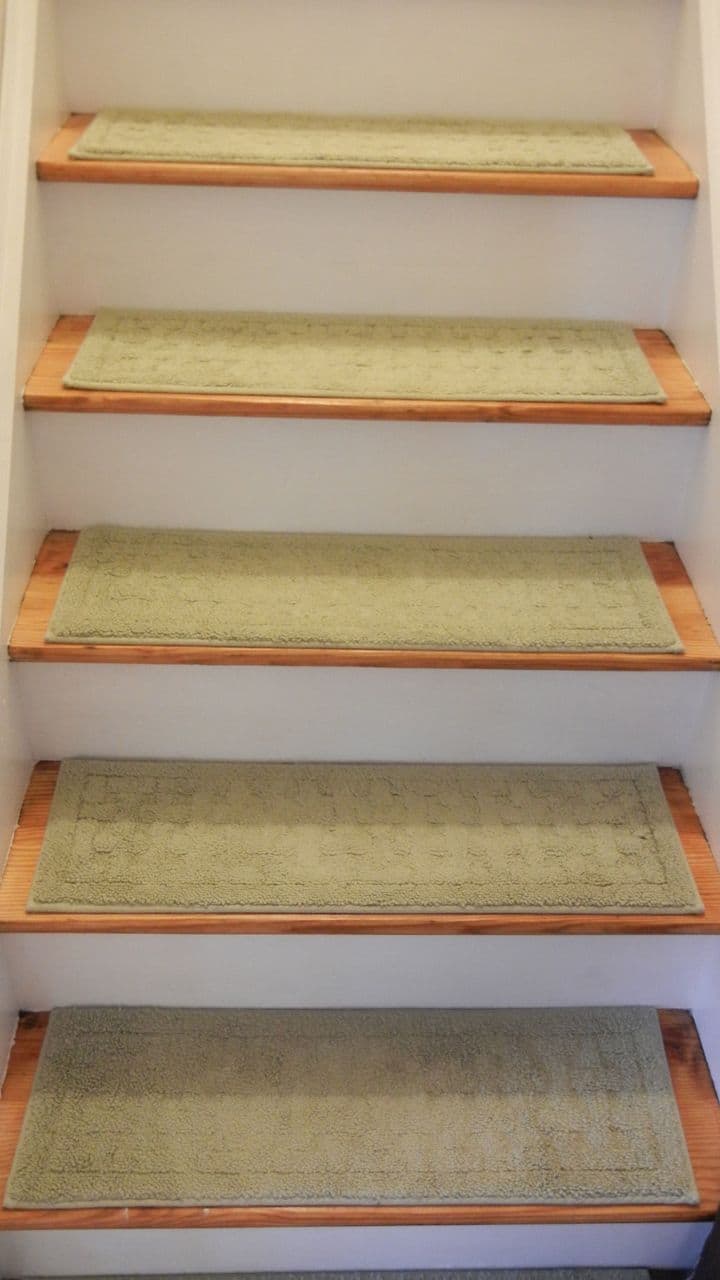
I really tried to get a picture of Griffin modeling the stair treads like those cute pups in the catalog picture, but alas, he’s a runner. You can imagine it though, can’t you? The treads make the stairs so much quieter, and I’ll have greater peace of mind knowing that our guests won’t break their necks.
The stairway area is holding steady for now, but eventually, I want to figure out a way to lighten the banister (maybe just by sanding it down and putting a few coats of polyurethane on it) and I also want to spray paint the hardware that secures the banister to the wall.
Anyone else out there with a slippery stair situation? Did you keep your stairway plain or did you doctor it up like me?