The tile is up, y’all. It’s up on the wall. Technically, it’s been on the wall for a while now, but I’m just getting this post up now. Sorry ‘bout it.
I picked the tile out a few weeks ago at Home Depot, and with everything else thrown in, our cart looked quite full.

We grabbed everything we needed for this job all in one shot. Or so we thought.
This tile job took about 5 different Home Depot trips. Oops.
The main supplies:
- Tile
- Thinset
- Grout
- Caulk
- Wet Saw
- Tile Spacers
- Sponges
- Grout Float
- Trowel
- Laser Level (Optional)
After watching a tiling video on a DIY YouTube channel more times that we’d like to admit, we decided we’d need that last item listed: the laser level. The tile being level within the universe was ultimately more important than the tile being in line with the counter. I still can’t wrap my head around that, despite what it might say about me or my head.
However, before we began laser-leveling, we had to sand the wall down a bit so that the thinset would really stick.

After sanding it down, I just wiped it all down with a wet rag to remove any dust that might discourage a nice seal between the tile and wall.
Another trick we learned from the DIY backsplash video was to lay out your tile beforehand. We did this in the beginning, but then quickly shifted to “let’s cut the tiles as we go.” We’re fly-by-the-seat-of-our-pants people. Maybe we should work on this to limit the Home Depot trips to one or two per project?

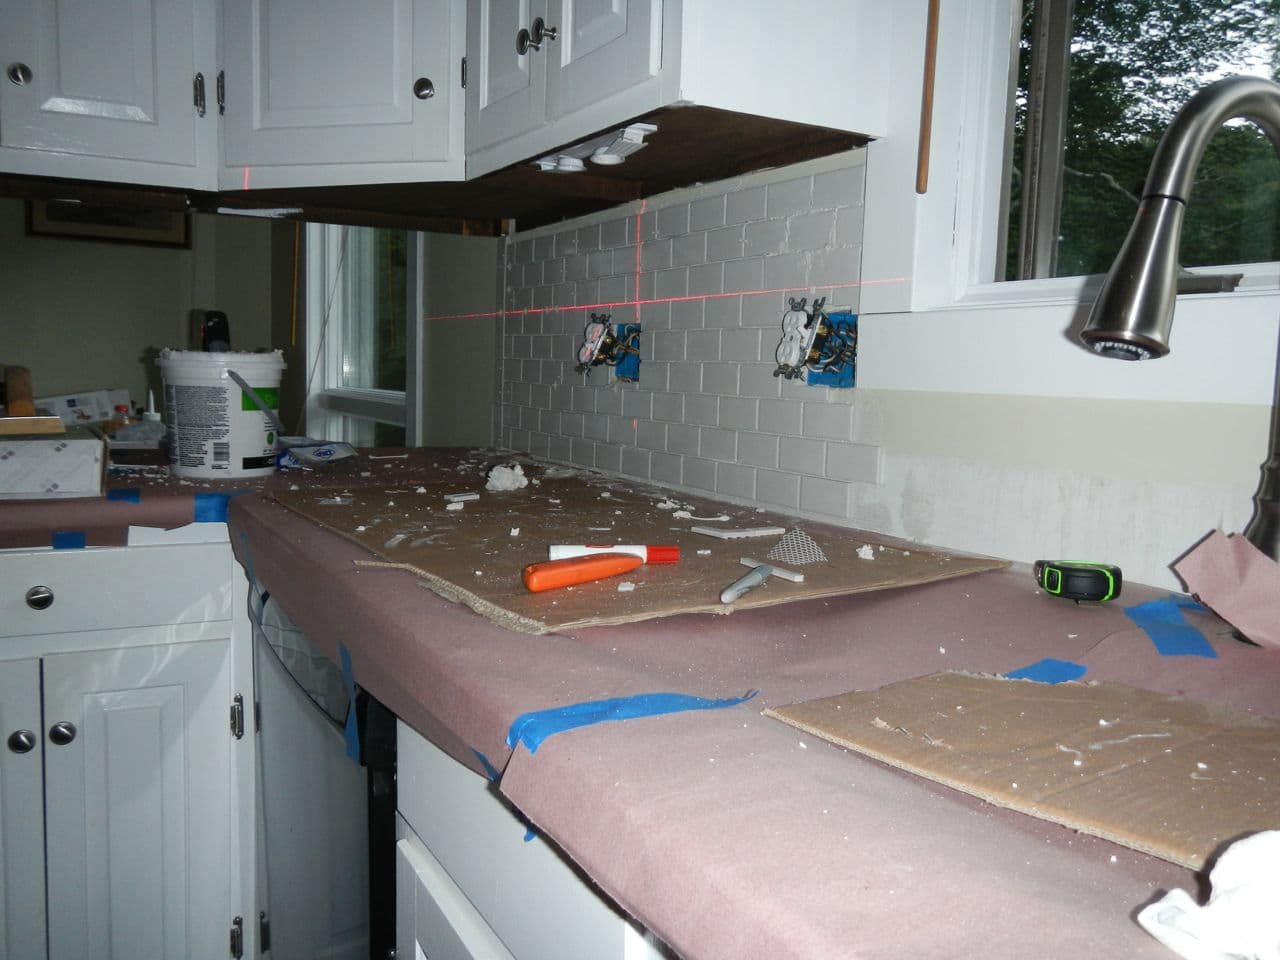
You’ll notice we covered our shiny new counters with rosin paper. This was a smart choice. I’m not sure if we got this from the video or not. It may have been one of those great ideas my husband has every once in a while. We propped up the laser level on some books and a GorillaPod and let it rip.

We added and subtracted books of different widths so we had the horizontal laser line to where we could hold up a sheet of tile and fit the entire sheet under the line. The less cutting, the better. Right?
All of the setting up made me hungry, so I grabbed a Kit Kat while Matt tested the line with a sheet of tile. He was a little annoyed. Mainly because he loves a good Kit Kat, too.

We moved to the right of the window, and I crawled up onto the counter to test the line in that spot, too. We sat the tile on wedge spacers to make sure we were leaving a gap between the counter and the tile at all times. You never want your tile and your counter to touch. As a final step, we knew we’d be caulking the space after the grout process was completed down the line.

With the line good to go, we needed to decide what to do about the end tiles. After discussing a few options, we decided to just turn the subway tiles on their side and create a mini border that way. We drew a pencil line where the tile would end, and Matt “back buttered” the tile that would kick off our first ever tiling job! I was so pumped. By the way, “back buttering” refers to applying thinset to the back of the tile instead of slathering it up on the wall. We used this technique for all of the smaller pieces of tile.

With a few cuts behind us with our new wet saw, (that was set up on the back deck) we were in business.

We bought a pre-mixed thinset, which was way more convenient, and just a hair more expensive. It worked out well for us, and we really just followed the directions on the container, as well as the mentally bookmarked instructions from the web tutorial. As for process, you use your trowel to scoop up a hearty serving of the thinset, (which is of peanut butter-like consistency) and drag it along the wall, being careful to put enough on so that the tile will stick, but not so much that it seeps through the tile cracks when you push it into the thinset. We used the flat side of the trowel to drag, and then finished with the grooved side after we had an appropriate amount of thinset.

To set the tile onto the thinset, we used the grout float and gently pressed the tile into the wall. We were moving along at a decent pace.
The outlets were obviously the trickiest and most time-consuming part of this process. I mentioned we had the wet saw on the back deck, and it was pretty easy to set up.

It was easy to use, too. I posted a painfully long and boring YouTube video with how the first cut went. You can check that out here. The main thing that kept going through my mind was to “let the saw do the work.” I picked that up from YouTube. ;) You want the saw to almost pull the tile towards the blade, with just a hint of pressure from you. The video I posted doesn’t really do it justice, because that was our first time ever cutting a tile, but by the end of two nights, we were pros.
Although I was scared of losing a finger, I stayed focused and ended up doing most of the cutting while Matt spread the thinset and set the tile. For one cut, I’d eyeball it. For more than one cut per tile, we used a dry erase marker to indicate the cut. It was a good process.
Until…
Night fell. It was inevitable, I suppose. We have lights back there, but I suffer from textbook entomophobia (spotting bugs in far off corners of the room and fidgeting uncomfortably until it’s killed or put outside). The bugs were flying around like crazy and my ankles were being bit to shreds. (Is that a thing?) I’m going with it.
Normally, I’d just swat the bugs away from my hair/neck/face/extremities. But, theses weren’t normal circumstances, of course. I had a 7” diamond blade saw spinning incessantly, cutting into ceramic tile and threatening my fingertips. If I jerked (a natural instinct for any entomophobe) at all, I’d risk slicing off something important to me.
So, what’s a girl to do when you need to keep on keeping on? Dress for the occasion, of course!

Scarf in summer?
Check.
Long sleeved shirt and jeans?
Check.
Tall socks pulled over jeans and tucked into hot pink crocs?
Check.
Sexy?
I’m going to go with… not so much.
Though really, who needs to look good when cutting tile? Yes, it was hot. Yes, I’d do it again. I’d take profuse sweat over bugs crawling on me any day of the week.
We kept on cutting and laying the tile until nearly 11pm, and lighting became a creative game, because the power to the kitchen was turned off. It was interesting.

At this point, it may have been the heat (thanks to the scarf and such) and it may have been the hours spent inhaling thinset, but I started singing Bruce Springsteen’s “Dancing in the Dark,” replacing “dancing” with “tiling.” Good times.
We stopped for the night when we reached the corner of the kitchen, and finished the other wall a few nights later. It took us nearly 9 hours to do the entire kitchen, but it was done and oh so worth it.

We gave the tile a few days to really set, and set our sights on grouting. That post next! Stay tuned…
P.S. What did you think of my tiling outfit? I should have snapped a full-view shot for you to get the whole look.