In the fall of this year, we will celebrate 3 years of home ownership. Our little baby is coming along slowly but splendidly. However, we noticed a trend along the way: we never finish one room… we tackle bits and pieces of each room and do so on a rotating basis.
When we first moved in, we painted all of the rooms hastily and did the necessary upgrades that were essential to living. Everything else was put on the back burner. Let me give you a couple of examples.
Example 1: Appliances? Essential. Range hood? Not so much. We installed new appliances (refrigerator, stove, dishwasher) but have yet to touch our reeeeeaaally outdated range hood. In fact, I am really embarrassed to admit that the range hood went waaaaaay too long without my wiping it down. Way too long as in I can’t even tell you how long. If I tell you, you’ll never come back to read my blog again, because that’s how grossed out you be be. Ew. In my defense, I never use it mainly because I doubt it’s effectiveness. That, and we don’t fry much.
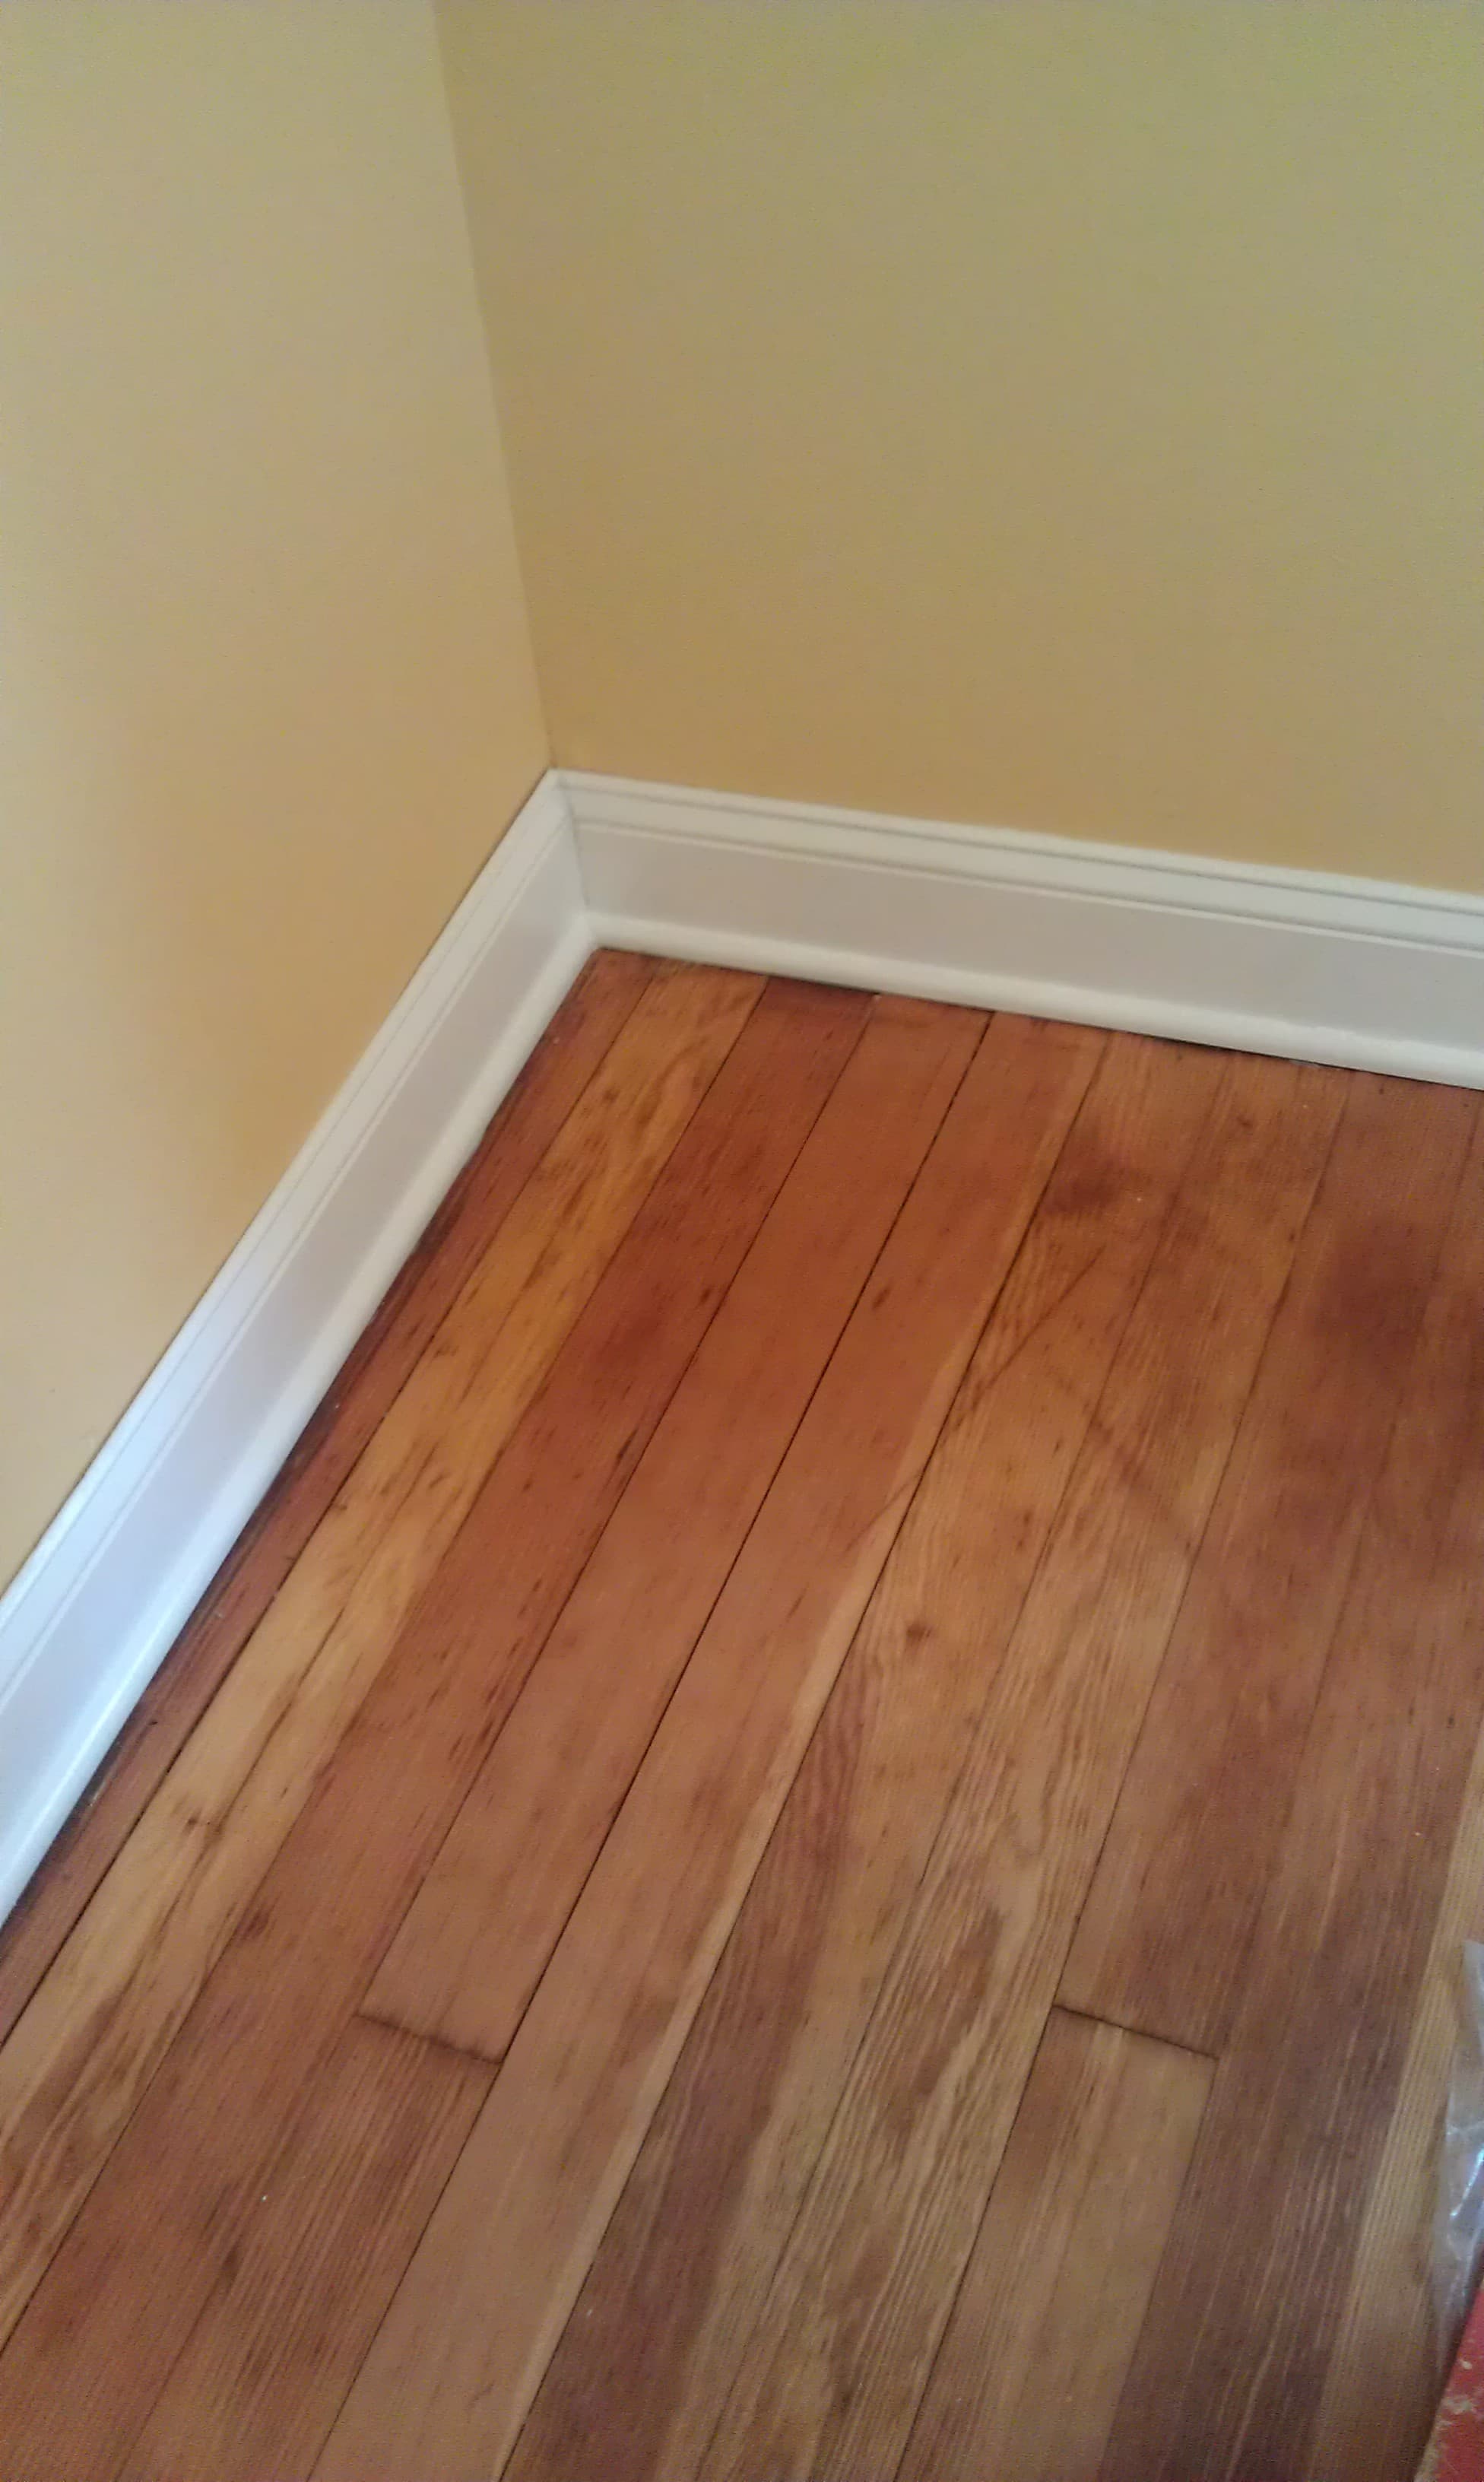
Example 2: Floors? Essential. New trim? Not so much. We had the existing hardwood floors refinished professionally. Matt installed new hardwoods in the rooms without existing hardwoods. They were gleaming and beautiful upon completion, but painting the trim that rested on said floors wasn’t a priority to a couple of new homeowners. So we have gorgeous floors but gross trim.
Both examples grind on me, and they’re something I have on the ol’ to-do list, but other things always come first. And besides, what fun is a house where everything is already done?!?! Right? RIGHT?!! Ha.
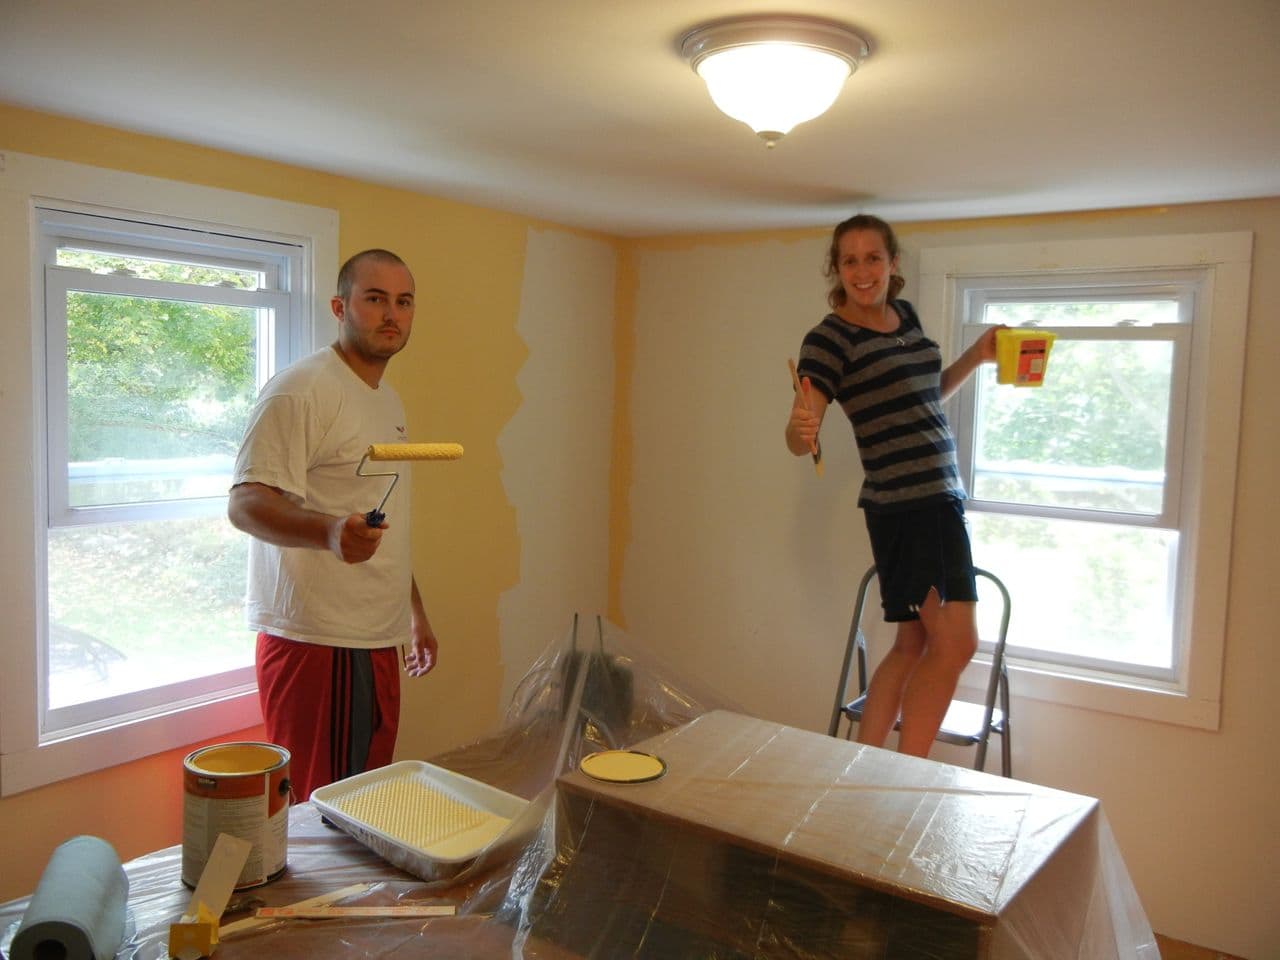
We got so sick of never feeling really, wholly, completely DONE with one room that we decided to change that last September. We chose to tackle our home office, seeing as it had turned into a catch-all room for junk, junk, and…wait for it… more junk. Laundry baskets, donations for Goodwill, old electronics and piles of mail always seemed to congregate in the office. Operation “take back the office” was soon underway. Here is what we were working with when we moved in:
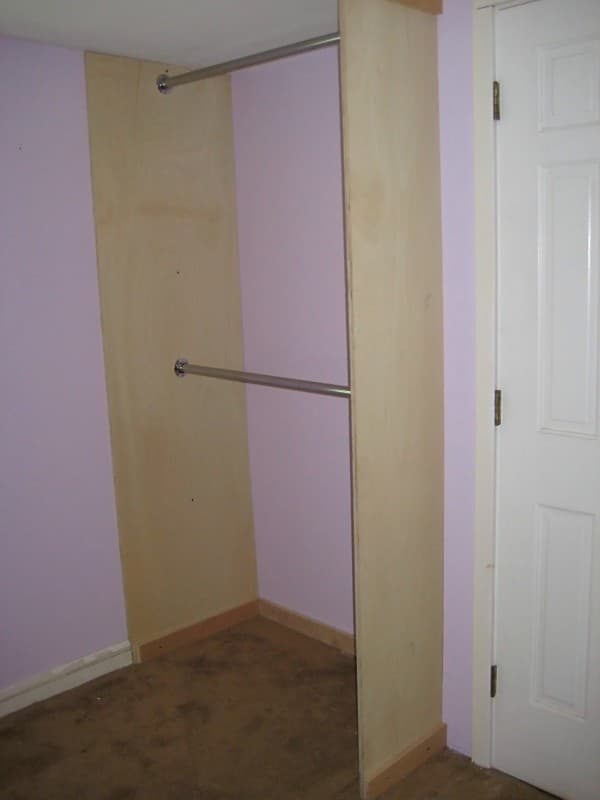
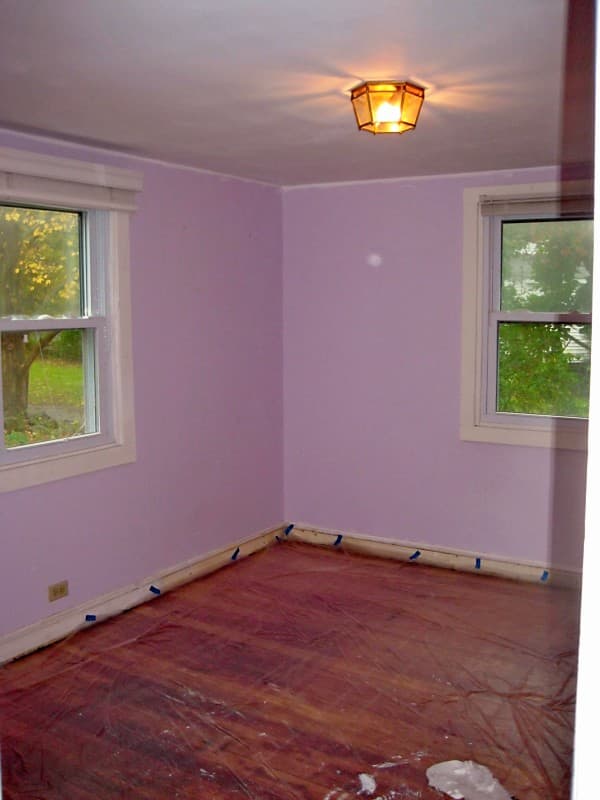
Lavender isn’t our jam. Neither is that naaaasty brown carpeting with questionable stains on it. That plywood “closet” came out immediately and so did the rug. That left us with floors to be refinished and white-ish trim to give a spruce-up. Here is a shot with the rug up and the plastic drop cloth down to prepare for a fresh coat of paint.
We think the previous homeowners were using the space as a fourth bedroom. The clues that brought us to that decision? The lavender walls and jerry-rigged closet. Call us Sherlock Holmes. However, at least the trim was white (as per my liking) and the refinished floors came out nicely. So all we really needed was:
-a use for the space that had been a “closet”
-a new light fixture
-new wall paint (when we decided on the color we wanted)
-fresh coat of white on the trim around doors and windows
-remove old baseboard trim and replace & paint crisp white
-furniture to define the room
-window treatments
-storage for all of our office-related accouterments
-new, bright white electrical outlets & covers
-art/frames
-area rug
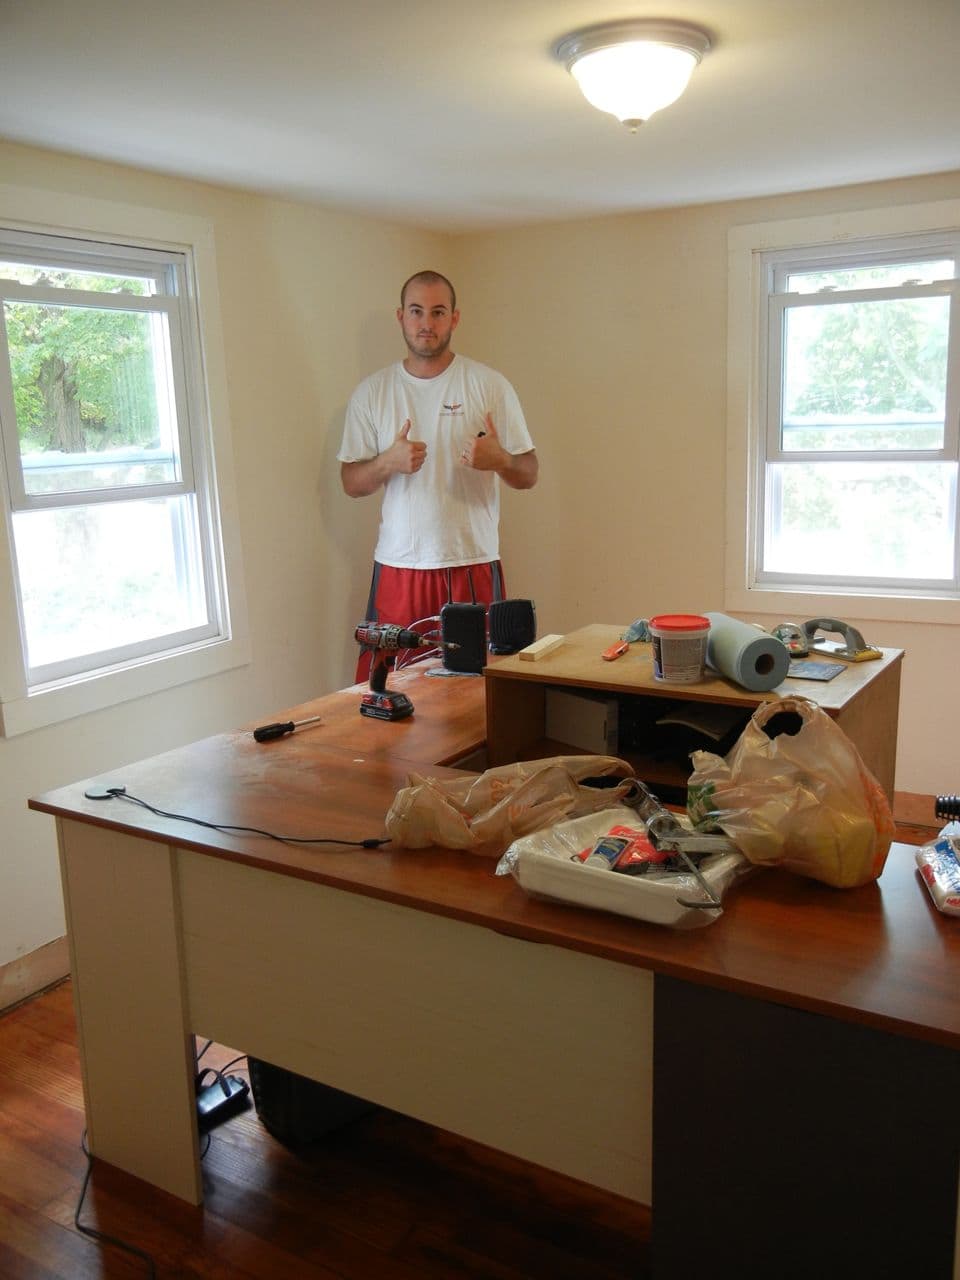
So we started at the beginning. We had a corner desk that I bought at Office Depot a few months after buying the house. I liked the antique white finish and rich wood top that matched the color of the floors. And that was about it. We had put an ivory color on the walls upon move-in because we weren’t sure at that point where we wanted to go with the room design-wise and thought it was at least something to cover the lavender. Good thing, too, because we lived with that room as-is for 2 years before finishing it!
You can see that ivory color below as well as this flush mount light Matt installed. It’s not my favorite, but the original light had to go. So $9.77 sounded good to us for a temporary solution. I still don’t know what to do for a light in there. I love the idea of a low-hanging pendant like this but wider, but the ceilings aren’t that high. Although there is little traffic in that room, so maybe I could get away with it?
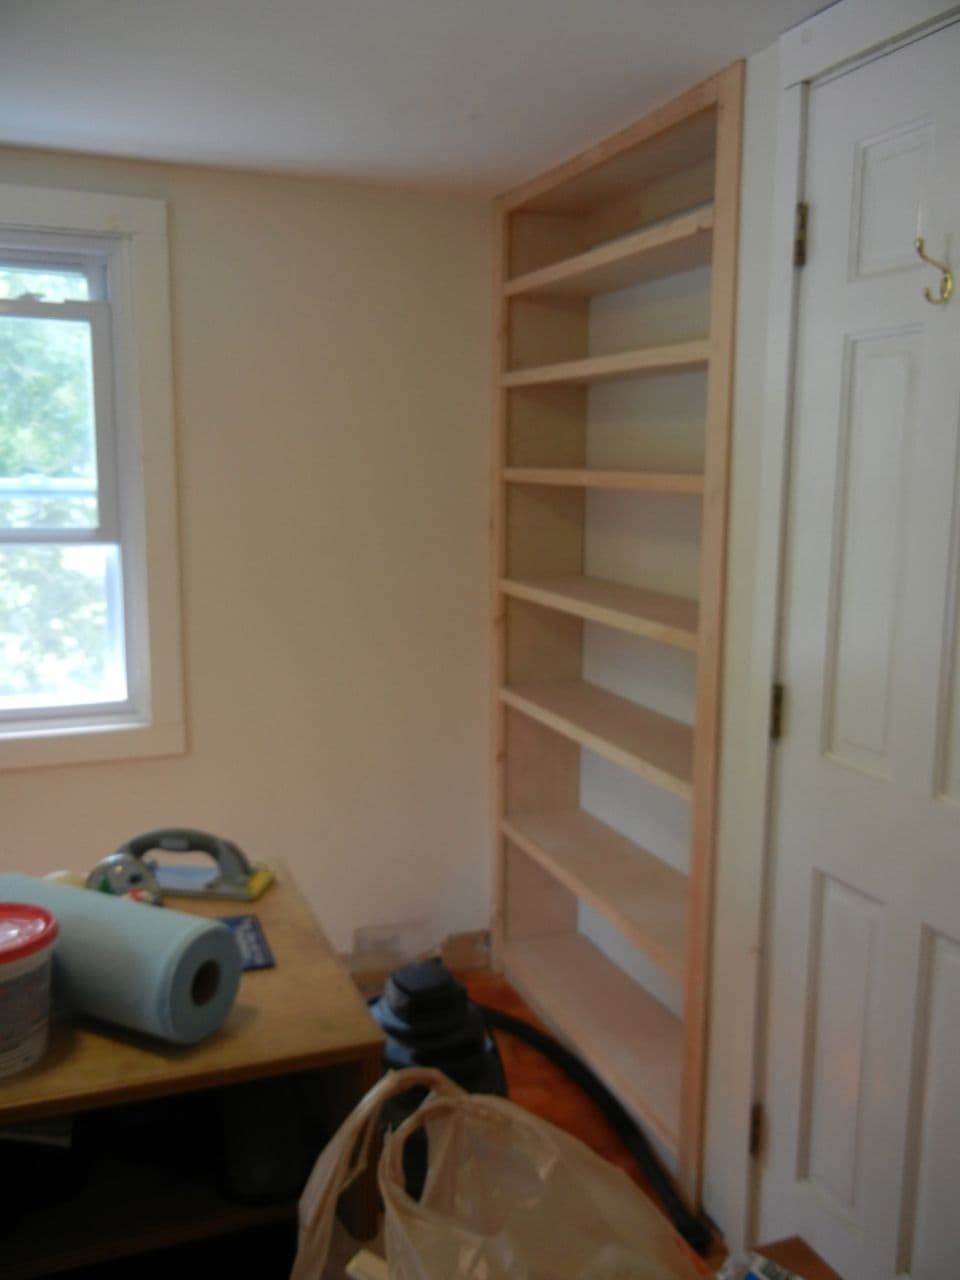
When it came to the space the previous owners used as a clothes closet, we both saw the space as a great opportunity for a built-in bookcase. It would add value to the house because it would create an architectural detail in an otherwise boxy room AND provide us with desperately needed storage for our favorite books, photo albums, frames, etc. I love having the space as a way to display some of my trinkets.
We went to Home Depot for the wood, and although I don’t have any pictures to document the construction, Matt was a man with a plan and got that baby up in a couple of hours.
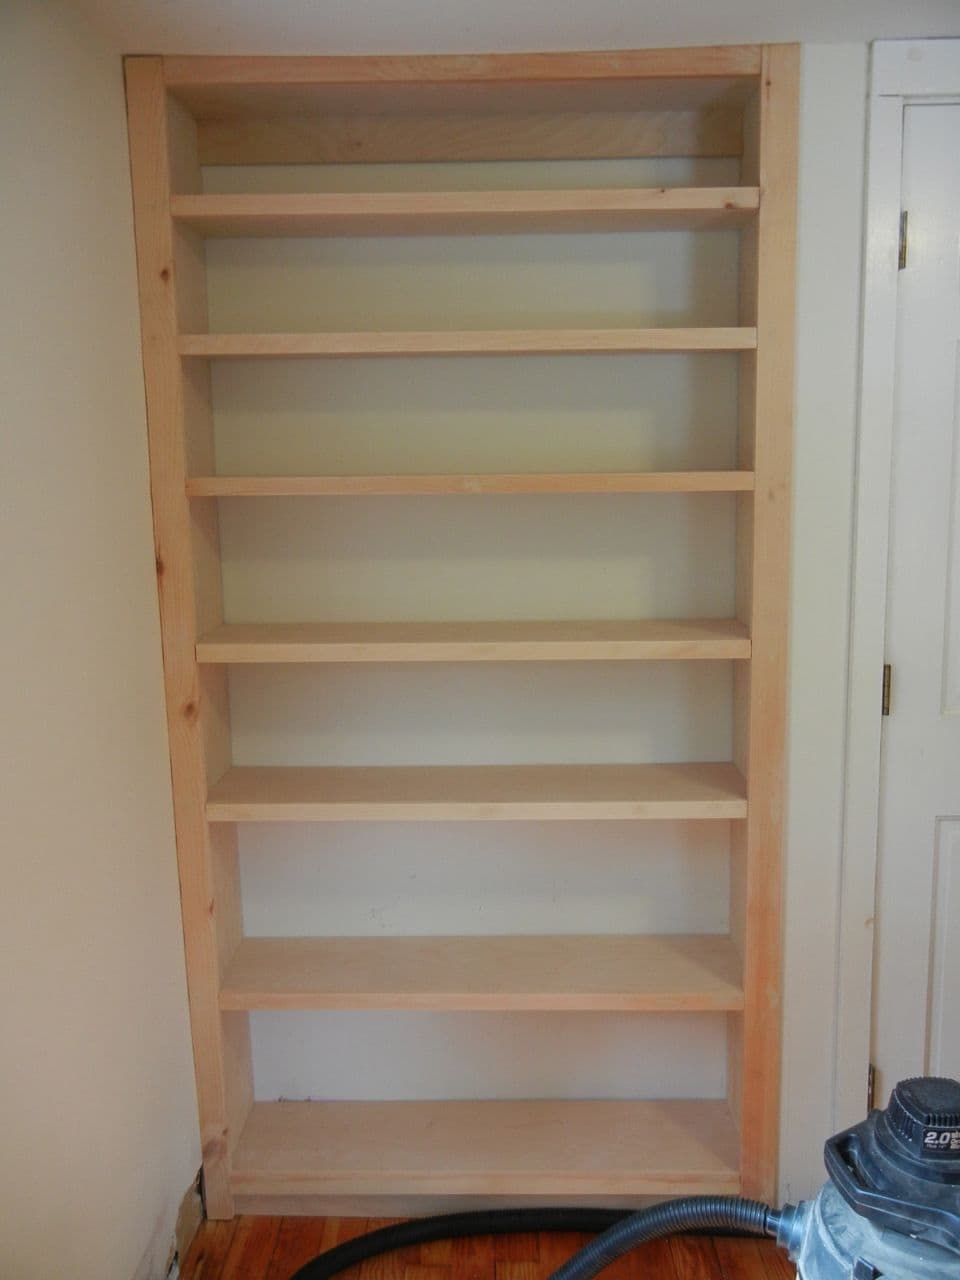
I can’t for the life of me find the receipt for the wood, but the total cost for the bookcase was probably around $50 or so (according to my memory - eek). I was in love with it then, and I still am. I love that my husband can build me whatever I have in mind with ease. He truly gives life to my dreams. We didn’t put wood along the back. It saved money, and I planned to paint the wall back there the same color as the bookcase (bright white) so it would look streamlined.
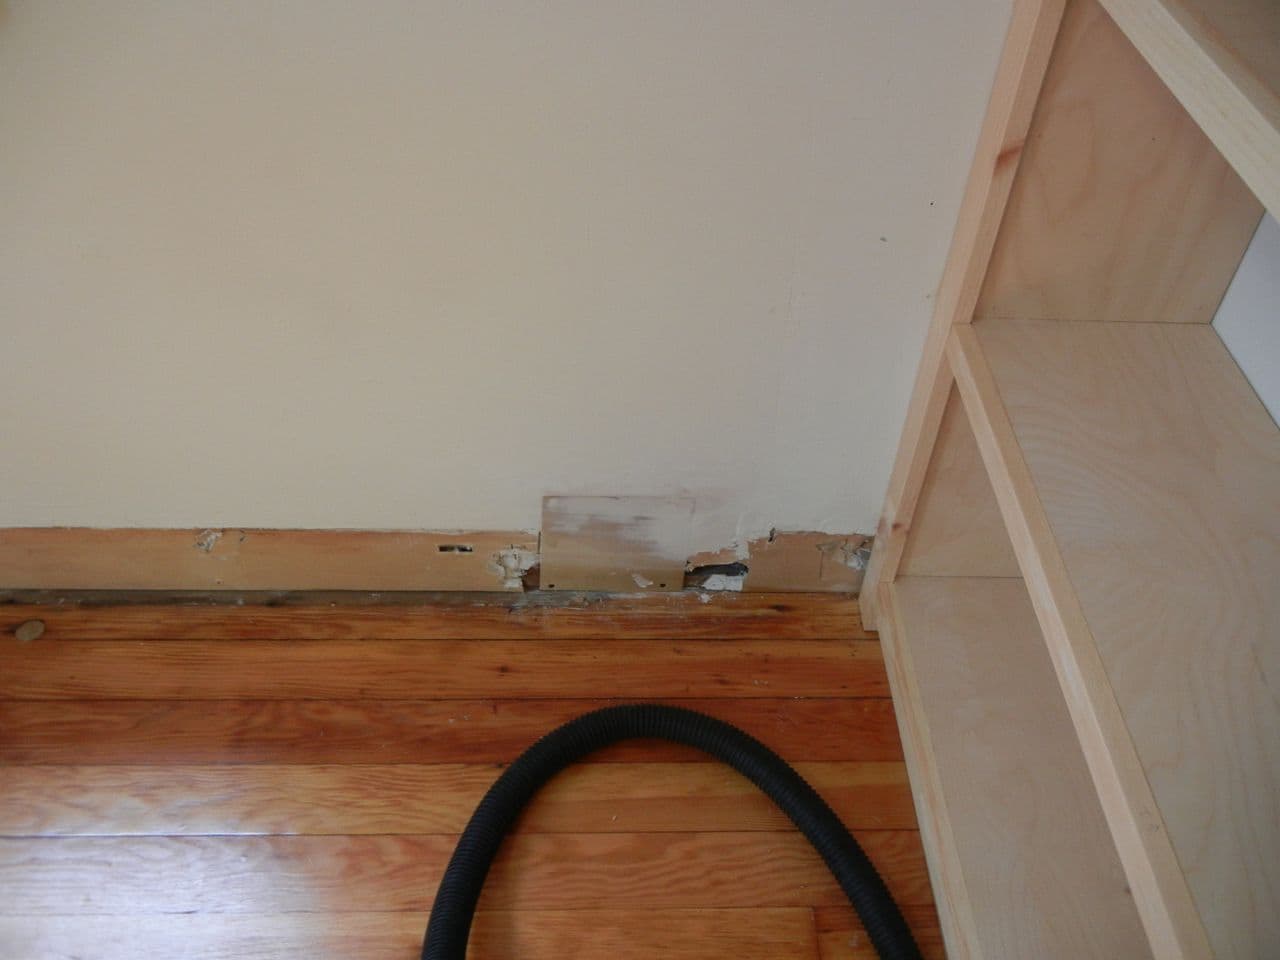
Once the bookshelf was in, it was time to rip out the old baseboard trim. I’m not sure if you noticed in the first pictures at the top of this post, but it was beyond a paint job. It was GROSS. I can’t believe we lived with it for so long. Shame. On. Us.
We ripped it out easily with a crowbar and patched that lovely hole seen below.
All of the old trim was out in minutes and we were ready to go pick out paint and new trim!
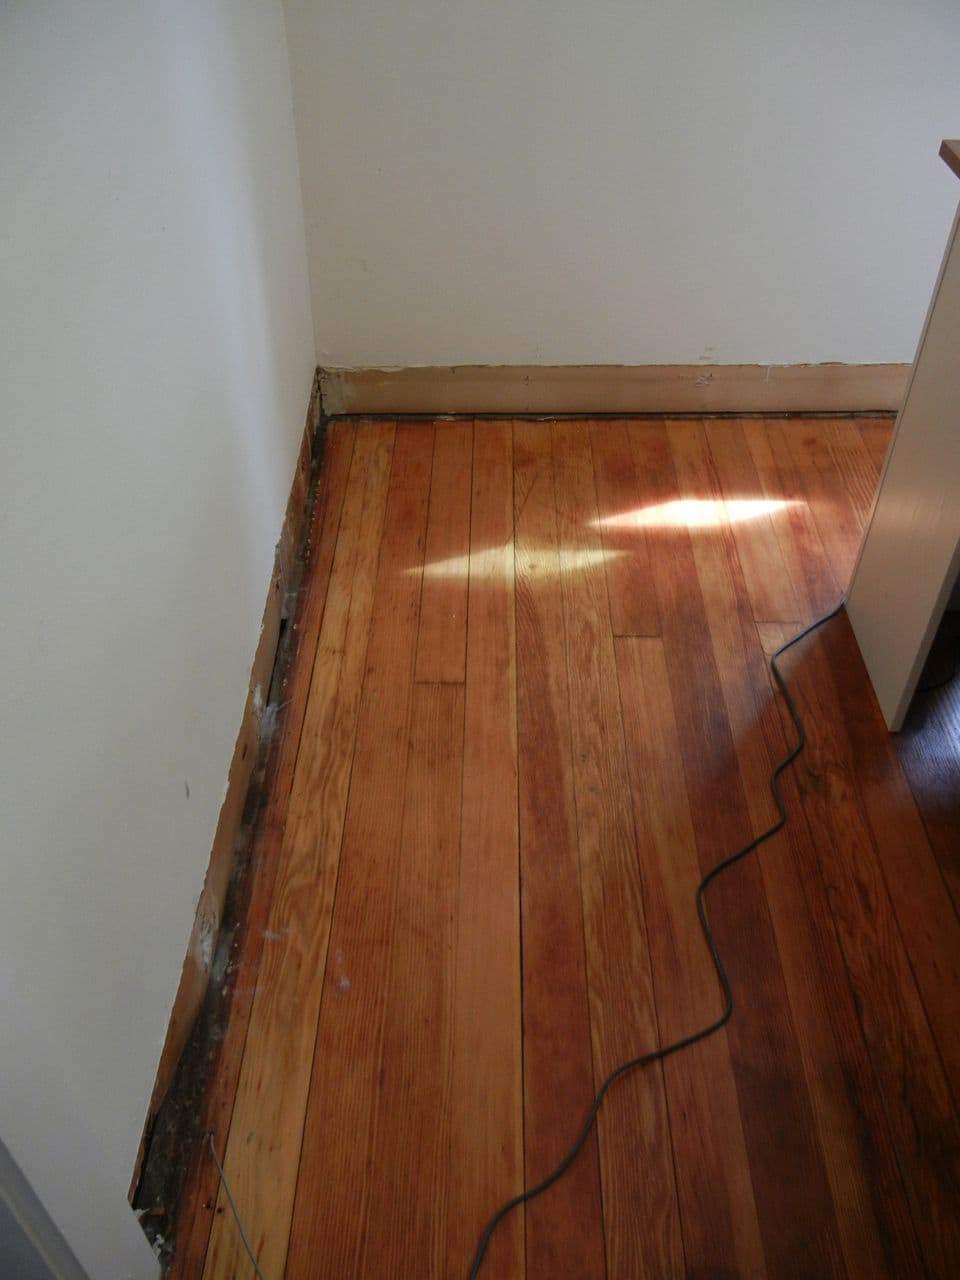
Because the original trim was wider than what were planning to install, Matt added a quarter-round piece of wood all the way around to cover the same spots on which the old trim sat.
When it was time to pick out paint, we went to Home Depot. We aren’t paint snobs in the slightest. Because the house is old, we don’t have perfect walls and therefore don’t expect a perfect paint job. We always look for a matte paint because that covers the imperfections the best but beyond that, we stick with what friends have recommended. We use Behr Premium Plus paints. It doesn’t break the bank and it has done very well for us.

We seem to have a knack for picking our paint based on the names on the paint chip. Sometimes the chip says it all, people. We picked “margarita” for our kitchen and the color we went with for the office was “bagel.” Apparently, we love food-related paint.

We went with the bagel not only because we love bagels, but we thought it had a fun punch of color that would go with the rest of the house. It had a neutral quality, yet also a boldness that would look nice with the white trim and black frames we planned to hang on the walls. I cut in and Matt rolls. That’s how we roll. No seriously, that’s how we roll paint. :)
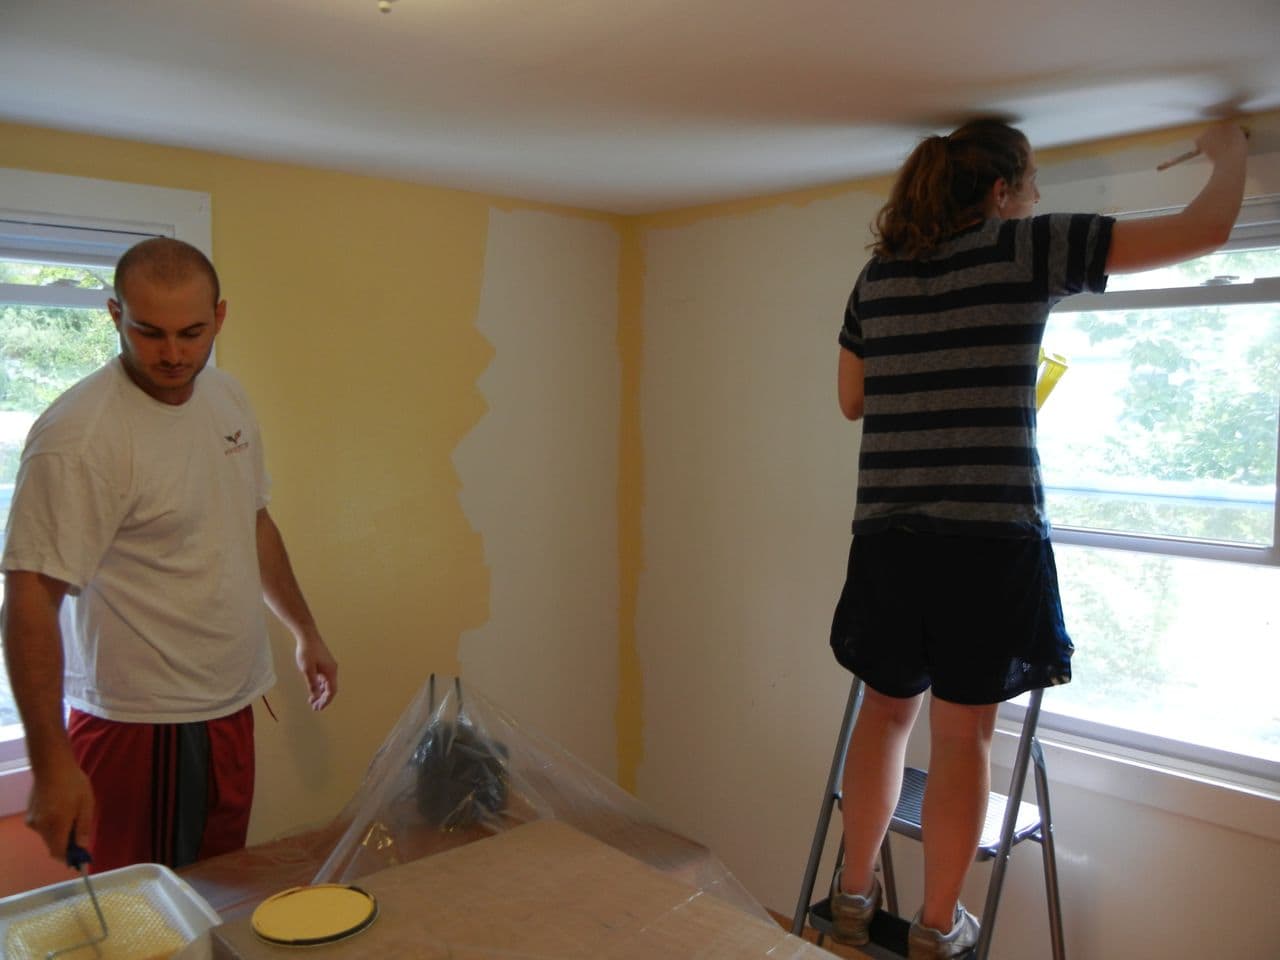
While taking time for a quick photo-op.
I loved the way this color looked against the white trim immediately. So fresh and fun yet calming, too. Once we had two coats of paint on, I ran around and did a fresh coat of white around the windows and doorways to really crisp it up. Matt nailed in the pre-primed trim and I got to work filling the nail holes with wood filler and putting two coats of white on the wood. I don’t have pictures of that part, but here are a few shots of the room & new trim painted.
And a night shot of the room before I start to prime and paint the bookcase.

Like most paint, the color changes as morning light changes to afternoon light yada yada yada, but we love the color in all lighting scenarios! The bookcase was next. And I was pumped.